Reading the Heat Pump Locally: eBUS Adapter Stick C6 and ebusd
Tapping the Vaillant aroTHERM plus eBUS with an eBUS Adapter Stick C6 and ebusd, for 678 local Home Assistant entities instead of a rate-limited cloud API — including the wiring, the MQTT flag that silently breaks discovery, and a heat pump model with no config file.
A follow-up to our heat pump install. That post ended with Home Assistant talking to the heat pump through Vaillant’s cloud API via mypyllant. It works, but it has hard limits: polling every 30 minutes, strict quotas that will lock you out, and only what Vaillant chooses to expose.
Underneath all of that is eBUS — the two-wire field bus Vaillant kit has spoken since about 2006. Tap it and you get the same data the controller sees, locally, at whatever rate you like.
Not EEBUS
Worth getting out of the way first, because I lost time to it: eBUS and EEBUS are unrelated.
- eBUS is the local two-wire bus between your outdoor unit, controller and cylinder.
- EEBUS is an IP standard running over your LAN, via the myVAILLANT connect gateway, for talking to energy managers — PV inverters, EV chargers, evcc.
I found an “EEBUS gateway info” screen in the myVAILLANT app — SKI, QR code, Model VR940 — and
briefly thought it was relevant. It isn’t. Nothing on that screen has any bearing on reading the
bus. Different layer, near-identical name.
The hardware
The eBUS Adapter Stick C6 — an ESP32-C6 in a 42×16 mm stick with a two-pin connector on one end and USB-C on the other.
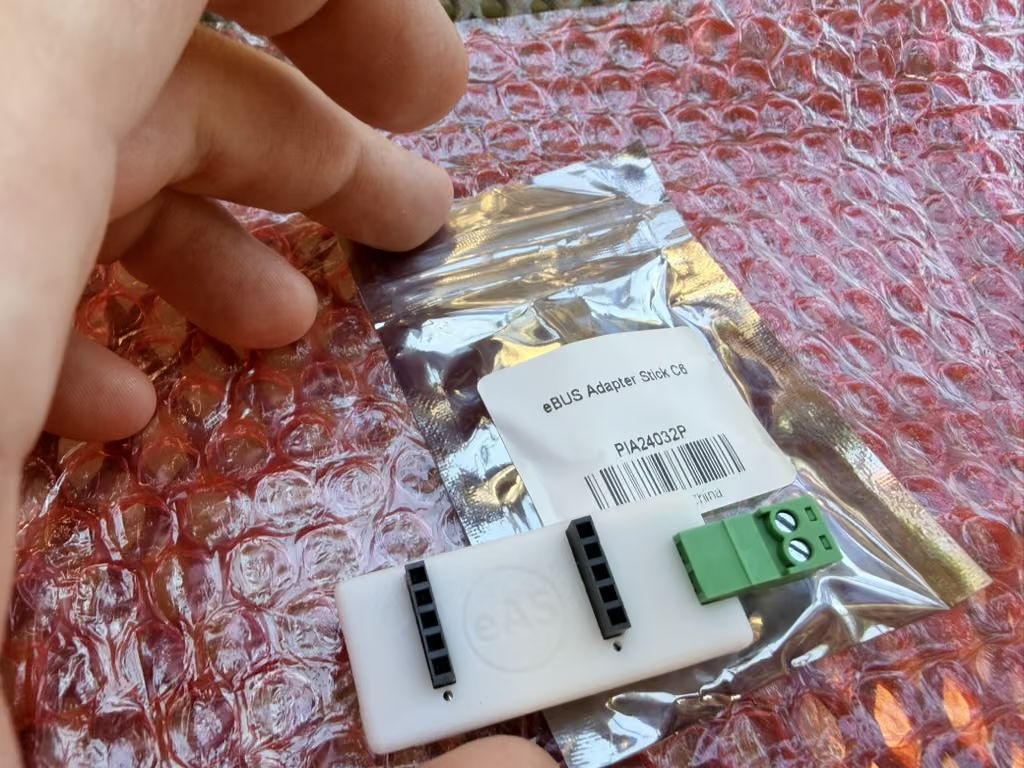
Two properties that matter:
- Galvanically isolated, class 0. It draws nothing from the bus. Adding it is electrically a non-event for the existing kit, which is the whole reason I was willing to put it on a system that’s three weeks old.
- It is not bus-powered. It needs its own USB supply, about 2 W. So wherever you mount it needs a socket, not just bus terminals.
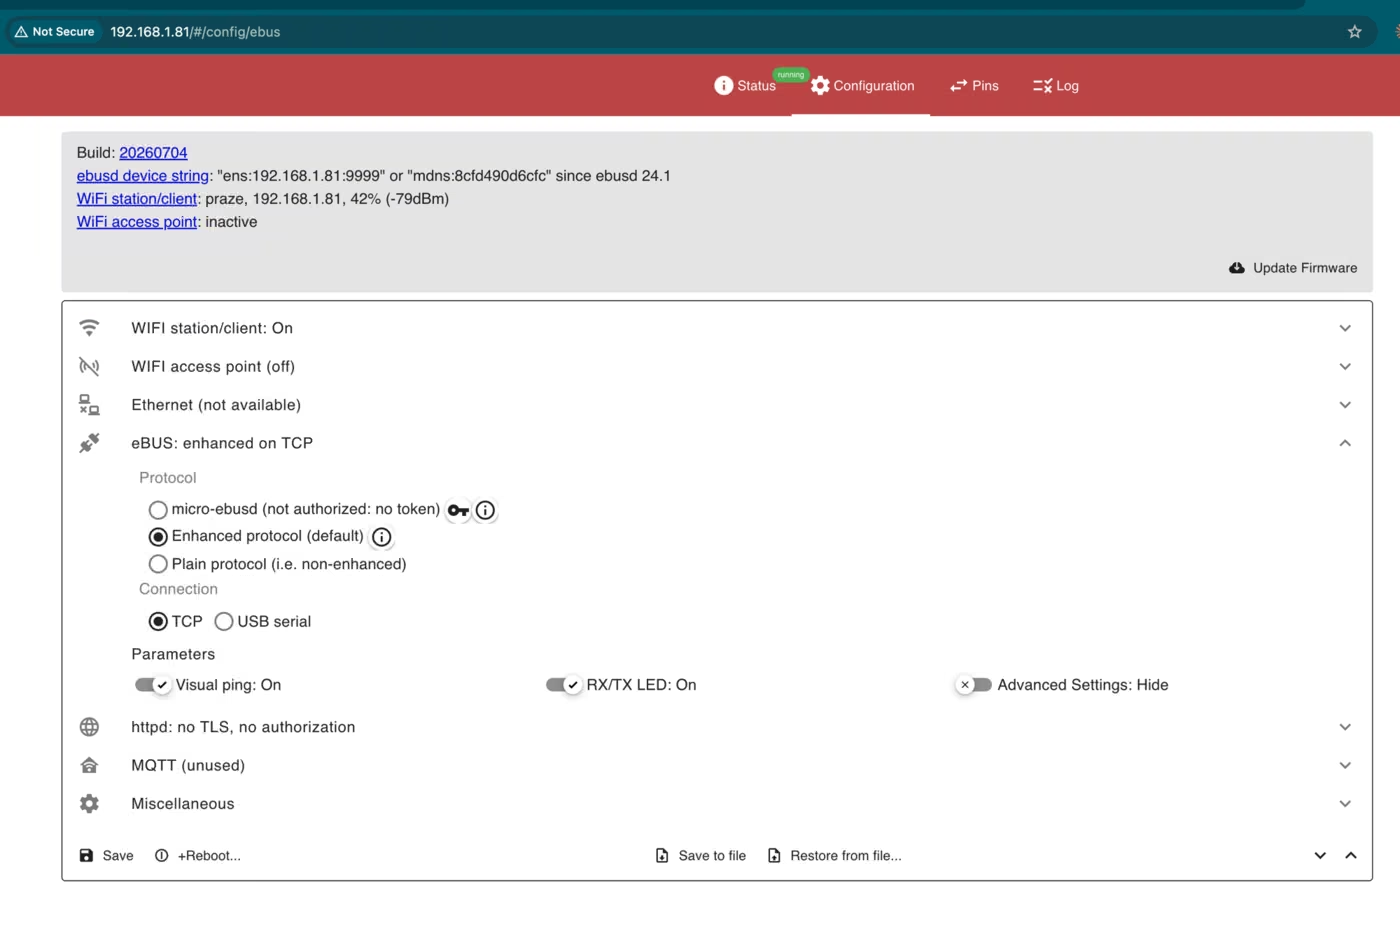
Mine arrived on firmware 20260118 and the current release was 20260704 — six months stale out
of the box, so update before you do anything else. Plug it in over USB and use the
web flasher, which needs Chrome or Edge for Web
Serial. The same tool provisions WiFi over the serial link, so your laptop never has to leave your
own network.
There’s also a serial console if you prefer: screen /dev/cu.usbmodem1101 115200 gives you an
easi> prompt where sta -s "SSID" "password" joins and stores, query and ip confirm, and
ota -t / ota -r update.
Leave the defaults alone otherwise. Enhanced protocol over TCP is what ebusd ≥ 24.1 wants, and
the config page hands you the device string ready to paste: ens:192.168.1.81:9999.
Cost
Ordered from Elecrow on 3 August, arrived inside the quoted 6–11 working days.
| eBUS Adapter Stick C6 | €23.00 |
| Shipping | €5.90 |
| Total | €28.90 (charged $32.04) |
Shipped DDP, so no surprise customs handling fee at the door — which for a sub-£30 item from outside the UK is the difference between a bargain and a mild annoyance.
I ordered the variant without the USR-ES1 Ethernet module, on the reasoning that WiFi in the plant room would be fine. Fifteen hours of uninterrupted uptime later, it was.
Wiring
This is less alarming than it sounds. eBUS is a parallel two-wire bus: outdoor unit, controller, cylinder and gateway all hang off the same two conductors. There’s no chain to break into and no port to occupy — any terminal pair is the same electrical point.
Vaillant specify 0.75 mm², two cores, 50 m maximum total bus length. Polarity doesn’t matter — the adapter rectifies internally, so either way round is fine. No shielding or twisting required.
In our plant room the sensoCOMFORT and the myVAILLANT connect box are mounted alongside each other,
which made the choice easy: low-voltage terminals on a wall plate, nothing mains-carrying to open.
The alternative is the indoor unit’s BUS terminal strip, which lives in an enclosure with 230 V
in it — isolate and verify dead if you go that way.
The existing bus wires stay where they are. You’re adding a second pair in parallel into the same terminals. If they’re screw terminals, two 0.75 mm² cores usually go in together happily. If they’re push-in, they take one conductor each and you want Wago 221 lever nuts: existing core in, a short tail back to the terminal, adapter core in the third port. Two Wagos, one per conductor. That’s what I used.
One detail that makes this much less fiddly than it sounds: the adapter’s green connector unplugs. It’s a pluggable terminal block, not a fixed socket, so you pull it off the stick, screw the cores into it comfortably in your hand, and push it back on. No working at an awkward angle, no opening the adapter, nothing to disassemble. Pull the plug, Wago it up, plug it back in.
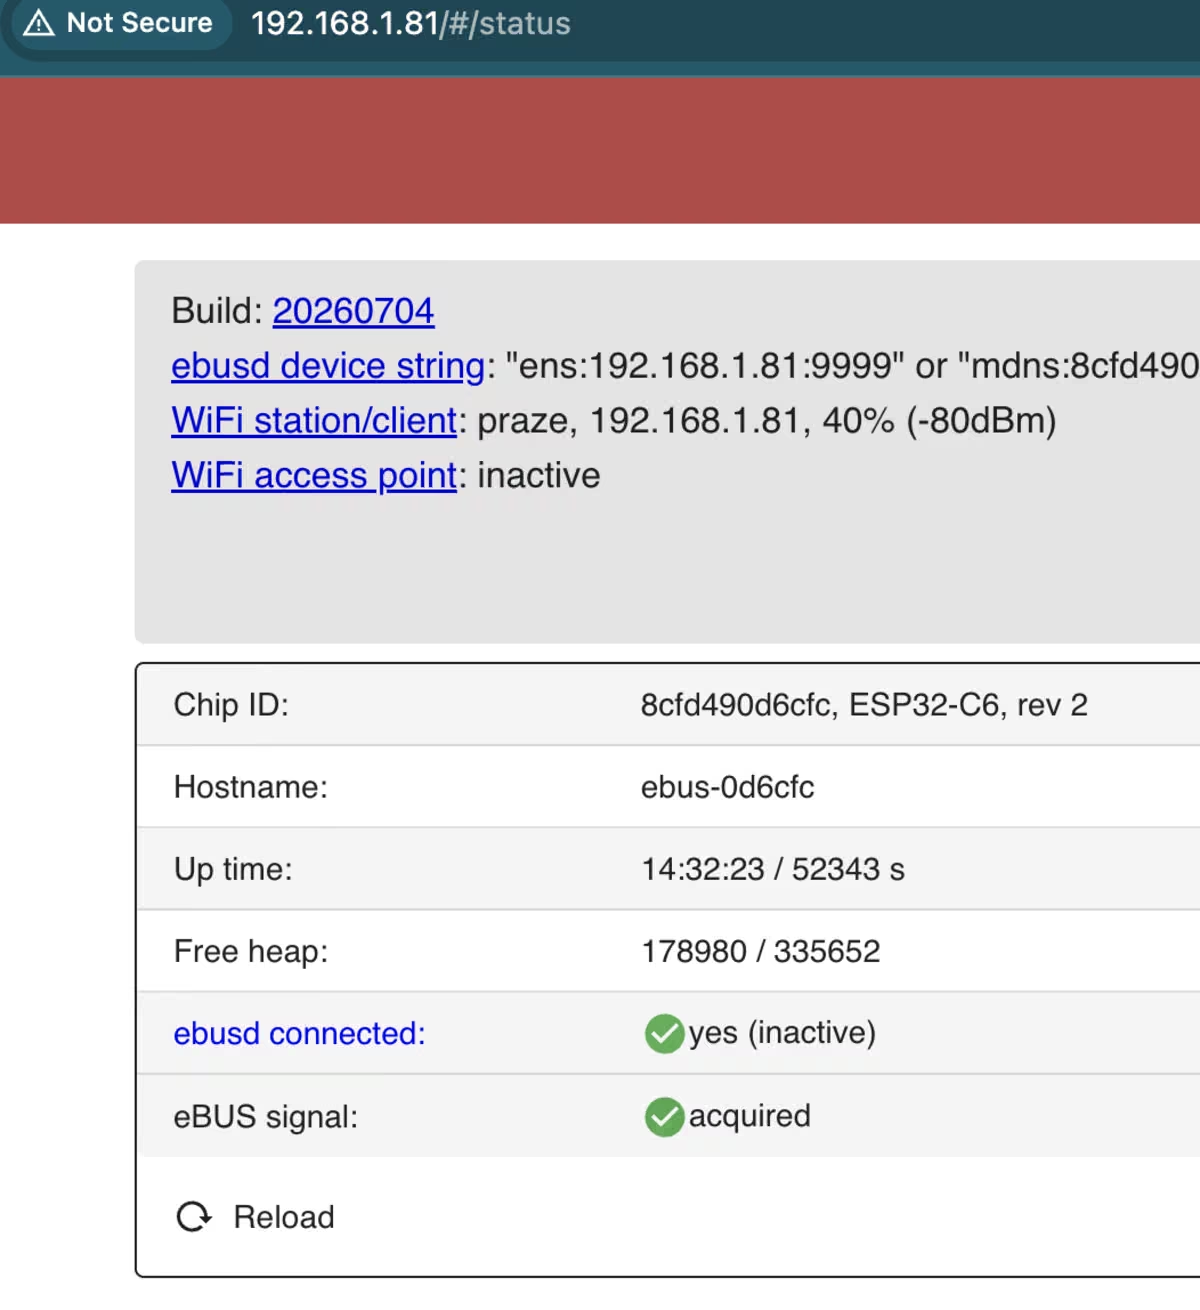
eBUS signal: acquired is the moment it’s done.
ebusd
ebusd runs alongside Home Assistant on the same Raspberry Pi. Two containers — a broker, since I had no MQTT at all, and ebusd itself:
  mosquitto:
    image: "eclipse-mosquitto:2"
    container_name: mosquitto
    network_mode: host
    restart: unless-stopped
    volumes:
      - /home/hendry/homeassistant/mosquitto/config:/mosquitto/config:ro
      - /home/hendry/homeassistant/mosquitto/data:/mosquitto/data

  ebusd:
    image: "john30/ebusd:latest"
    container_name: ebusd
    network_mode: host
    restart: unless-stopped
    depends_on:
      - mosquitto
    command:
      - --foreground
      - --device=ens:192.168.1.81:9999
      - --scanconfig
      - --mqtthost=127.0.0.1
      - --mqttport=1883
      - --mqttjson
      - --mqttretain
      - --mqttint=/etc/ebusd/mqtt-hassio.cfg
      - --httpport=8889
Three flags earn their place:
--foreground— without it ebusd daemonises, PID 1 exits, and the container stops.--mqttint=/etc/ebusd/mqtt-hassio.cfg— ships inside the image and drives Home Assistant’s MQTT discovery. Paired with--mqttjson, per the file’s own header.--mqttretain— the one that cost me an hour. Without it the discovery topics are published once at MQTT connect and never retained, so anything that starts after ebusd never sees them. It looks exactly like a broken integration. With it, the config topics stick and Home Assistant picks them up whenever it connects.
Home Assistant’s MQTT integration is config-flow only, so it has to be added through the UI:
Settings → Devices & Services → Add Integration → MQTT, broker 127.0.0.1, port 1883, no
credentials.
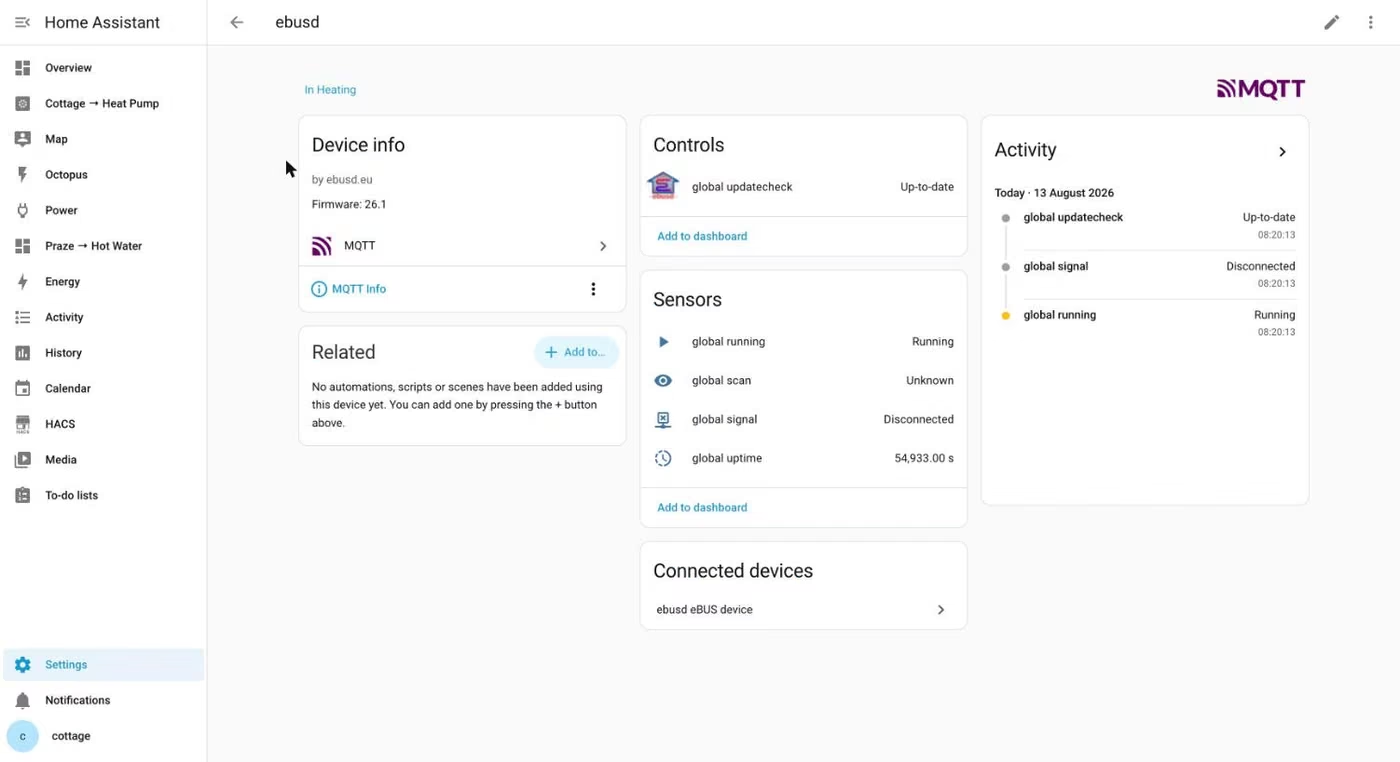
A nice touch: before wiring anything, you still get an ebusd device with global running,
global signal and global uptime. global signal reads Disconnected until the cores land, which
makes it a proper end-to-end test — you can prove the whole software chain works before you go
anywhere near the heat pump.
What you get
--scanconfig discovers what’s on the bus and downloads matching definitions automatically:
masters: 6
messages: 702
address 08: slave, "MF=Vaillant;ID=HMUX0"  → the heat pump
address 15: slave, "MF=Vaillant;ID=BASV3"  → system controller
address 76: slave, "MF=Vaillant;ID=VWZIO"  → the VWZ IO box
address 04: slave, "MF=Vaillant;ID=NETX3"  → myVAILLANT connect
That’s 678 Home Assistant entities, against roughly 50 from the cloud integration. Flow and return temperature, cylinder temperature, heat curve, pump status, mixer position, every setpoint, the error registers.
It also settled a small mystery: the white box in the plant room with the running energy totals,
which I never identified in the last post, announced itself as VWZIO.
COP, without asking Vaillant
This was the one I most wanted, and yes — it’s all on the bus.
hmux0 CopHcMonth            2.1
hmux0 CurrentConsumedPower  0.0
hmux0 CurrentYieldPower     0.0
hmux0 YieldHwc              110
basv  YieldTotal            124
basv  PrEnergySumHwc        34
basv  PrEnergySumHc         10
CopHcMonth is the heat pump’s own monthly figure, computed on board. But the two that matter more
are CurrentConsumedPower and CurrentYieldPower — instantaneous electricity in and heat out.
Divide one by the other and you have live COP, at whatever resolution you care to sample, rather
than a monthly average someone else calculated. Both read 0.0 above because it’s August and the
thing is asleep.
That’s the difference in a sentence: the cloud gives you Vaillant’s answer, the bus gives you the inputs. If I want COP against outdoor temperature, or COP during an Octopus dispatch slot versus outside one, I can compute it from data I hold — and I keep the history even if the integration, the API or my account go away.
Control, not just monitoring
Less obvious: ebusd can write to the bus, and 220 of the discovered messages are writable. Among them:
Hc1HeatCurve— the weather compensation curve itselfHc1MaxFlowTempDesired/Hc1MinFlowTempDesired— flow temperature limitsCylinderChargeOffset,CylinderChargeHyst— hot water charging behaviourCcTimer_Monday…CcTimer_Sunday— the schedules
The cloud API offers a quick veto and not much else. This is the actual installer-level control surface. For what I’m trying to do — nudge the curve for a cheap window and put it back — that’s the difference between a workaround and the real lever.
Two caveats I’d want a reader to take seriously. Writing to a heating system’s setpoints is a genuinely different risk class from reading them, and I am not writing anything through a config file that’s only a partial match for my hardware. Read-only for now; the capability is there when the config is solid.
A local API
--httpport=8889 gives you ebusd’s own JSON endpoint, no MQTT involved:
curl 'http://five:8889/data/hmux0?def=0'
Handy for scripts and for poking at things without going through Home Assistant at all.
One honest note on all of the above: plenty of fields read no data stored until ebusd has either
polled them or seen them go past on the bus. A freshly started daemon looks sparser than it is.
| Cloud API | eBUS | |
|---|---|---|
| Update interval | 30 min | seconds |
| Entities | ~50 | 678 |
| Live power in / heat out | no | yes |
| Writable settings | quick veto | 220 messages |
| Quota | strict, will ban you | none |
| Works if internet is down | no | yes |
The gap: no config for HMUX0
--scanconfig found the heat pump and then refused it:
unable to load scan config 08: no file from vaillant with prefix 08
matches ID "hmux0", SW0406, HW0504
Upstream ships 08.hmu.csv, but our unit identifies as HMUX0 and nothing matches. This is
a known gap — the 8.1 generation is
newer than the config. Without it you get the controller’s view of the system but nothing from
the heat pump itself, which is where compressor data and COP inputs live.
The workaround is to mirror the config tree locally, copy 08.hmu.csv to 08.hmux0.csv so the ID
matches, and point ebusd at the local copy with --configpath:
mkdir -p ebusd-config/vaillant
# fetch https://ebus.github.io/en/{broadcast,memory}.csv and en/vaillant/*.csv
cp ebusd-config/vaillant/08.hmu.csv ebusd-config/vaillant/08.hmux0.csv
It’s a partial fit, and I want to be honest about that. Some messages decode correctly —
Status01 gives flow 25.5 °C, return 24.0 °C, and an outside temperature that matches the
controller’s own reading exactly, which is decent evidence it’s real and not plausible-looking
garbage. YieldHcMonth and CopHcMonth come through. Others throw invalid position in decode
and some don’t exist in the file at all.
Two costs worth weighing: ebusd now reads everything from the local mirror, so upstream config improvements no longer arrive on their own — it started reporting “different version available” within the hour. And a partially-matched config is not something I’d write to the bus through. Read only.
Why this doesn’t qualify for heatpumpmonitor.org
With live power in, heat out and both flow and return temperatures, my first thought was that I could contribute to heatpumpmonitor.org — the open dataset of UK heat pump installations, which is genuinely one of the more useful things on the internet if you want to know how these machines behave in real houses rather than in a brochure.
I can’t, and it’s worth explaining why, because the reason is more interesting than “you need to buy their box”.
| What they need | What the bus gives me | |
|---|---|---|
| Flow temperature | 27.0 °C | ✅ |
| Return temperature | 25.5 °C | ✅ |
| Outside temperature | 21.7 °C | ✅ |
| Flow rate | nothing at all | ❌ |
| Heat energy, MID Class 2 | Vaillant’s internal estimate | ❌ |
| Electrical input, MID Class 1 | Vaillant’s internal estimate | ❌ |
There is no volumetric flow rate anywhere on the eBUS. I went through the whole message set
looking for it. Without flow rate you cannot compute heat output yourself at all — you’re entirely
dependent on the heat pump’s own CurrentYieldPower, which it derives rather than measures.
Their standard is MID Class 1 electricity and Class 2 heat metering at the SEPEMO H4 boundary, logged every ten seconds. That sounds fussy until you consider what the dataset is for: every system in it is measured the same certified way, which is the only reason comparing two of them means anything. A system quietly contributing manufacturer-derived numbers would look identical in the table while measuring something different — and manufacturer heat estimates have a reputation for flattery, which is exactly the bias you don’t want in a public dataset. They’re right to insist.
The fix is their Level 3 bundle: MID Modbus electricity meter, MID M-Bus heat meter, emonHP logger, £582 including VAT. And the money is the smaller cost — fitting the heat meter means draining down part of the system, so it’s a plumber’s visit rather than an afternoon with a screwdriver.
I’m not going to do it. Not because it’s bad value — for the people building that dataset it’s obviously worth it — but because £582 and a drain-down to obtain more correct versions of numbers I can already see isn’t a trade I want at my scale. My £29 stick tells me when the compressor runs, what the flow temperature is doing, and roughly what the COP looks like. That’s enough to make decisions with. It just isn’t enough to publish.
Worth being clear that the two aren’t competing. A heat meter measures the boundary — what actually reached the house. eBUS shows the internals a heat meter can’t: compressor behaviour, defrost cycles, the curve, every setpoint. If I ever did fit emonHP, the adapter would stay.
Odds and ends
ebusd recovers on its own. I rebooted the adapter mid-setup and never had to touch anything — it logged the dropped transport, retried, and re-opened the connection within twelve seconds. Worth knowing before you mount the thing somewhere inconvenient.
Pin the adapter’s address. The ens:192.168.1.81:9999 device string is an IP, so a lease change
silently breaks the link — I gave it a fixed address in UniFi. If you’d rather not care about
addressing at all, the adapter also publishes an mDNS device string (mdns:8cfd490d6cfc, its chip
ID) which ebusd accepts in place of the IP.
The bus is not a replacement for the cloud integration. They complement each other: eBUS for depth and speed, mypyllant for the things Vaillant computes server-side. Both are running here.
Next job is space heating optimisation with real data behind it, which was the point of all this. That needs a winter.